Customer Support
“Customer support” addon enhances the feature to provide professional supports to your users. Anyone can send the support tick concerning any issue about the application.
To active this addon, you have to install this addon on your application. Now, you have to follow the simple steps below:
- Before installing the process, we highly recommend you check your application version. For this, you have to navigate to the “About” option from the “Settings” menu.
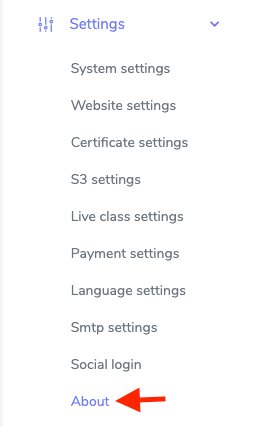
Figure 1. Academy LMS Checking Application Version
- If you are running the mentioned version, then you are ready to install this addon.
- Download the addon you want to install on your application from Codecanyon.
- Unzip the downloaded file.
- You will get two folders inside the file. One for documentation and the other for the addon folder.
- Do not try to remove or rename any folder.
- Go back to the application and log in as an admin.
- Select the “Addon” option from the left menu.
- Click on the “Install addon.”
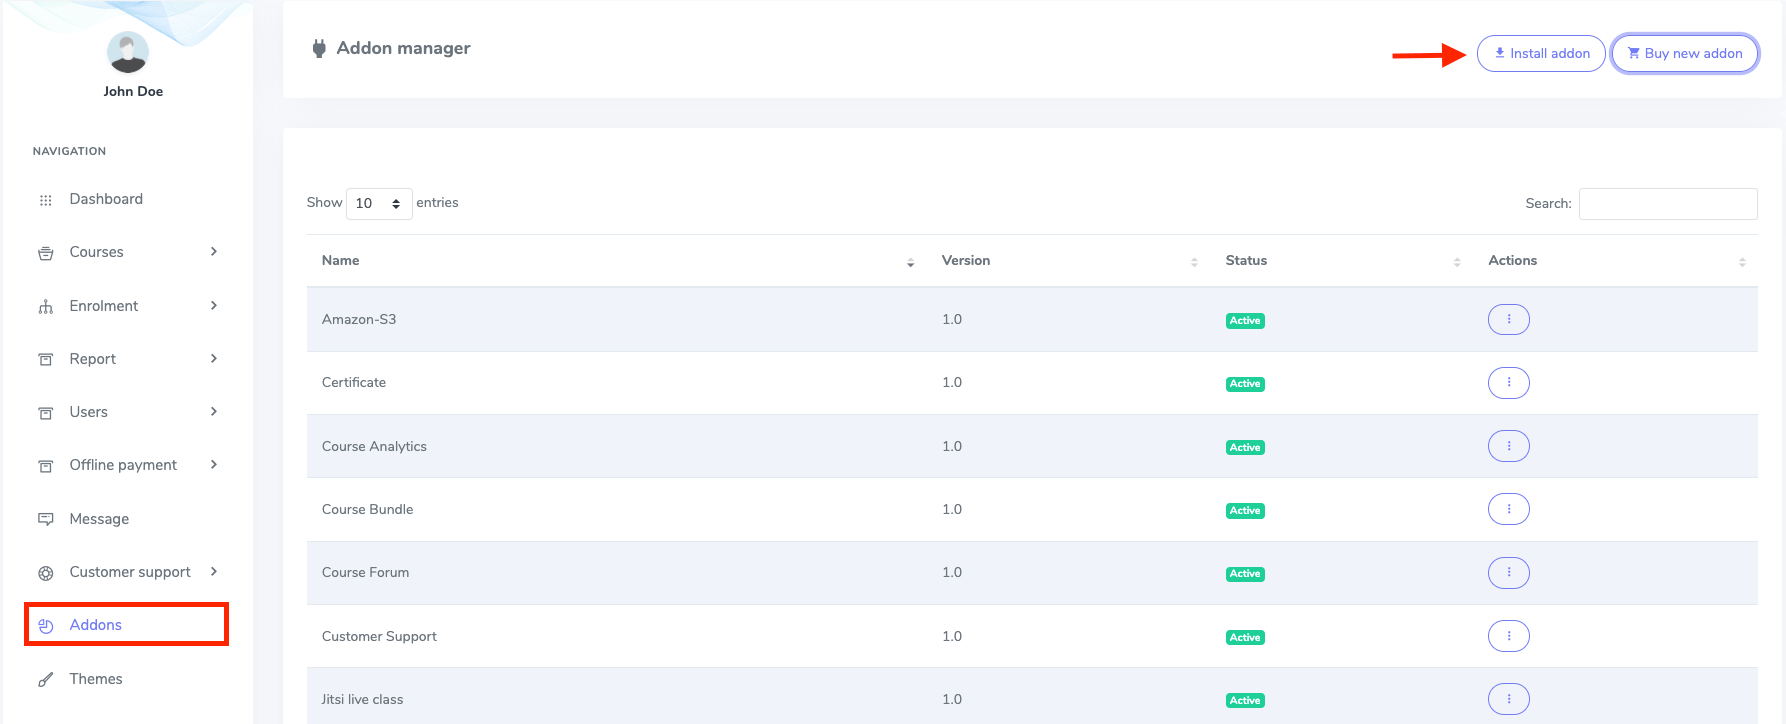
Figure 2. Academy LMS Addon Manager List
- Provide the purchase code.
- Upload the zip file from your device.
- Click on the “Install addon” button.
- You will get a success message notification.
Admin Panel:
As an admin, you can view or close tickets, add supports category, manage macro, or create a ticket for any user.
To manage the user’s tickets, you have to navigate:
- Log in to the admin panel.
- Select the “Customer support” option from the left menu.
- Choose the “Ticket list” from the sub-menu.
In this sub-menu, you can overview:
- Ticket ID
- Title
- Category
- User name
- Priority
- Action section
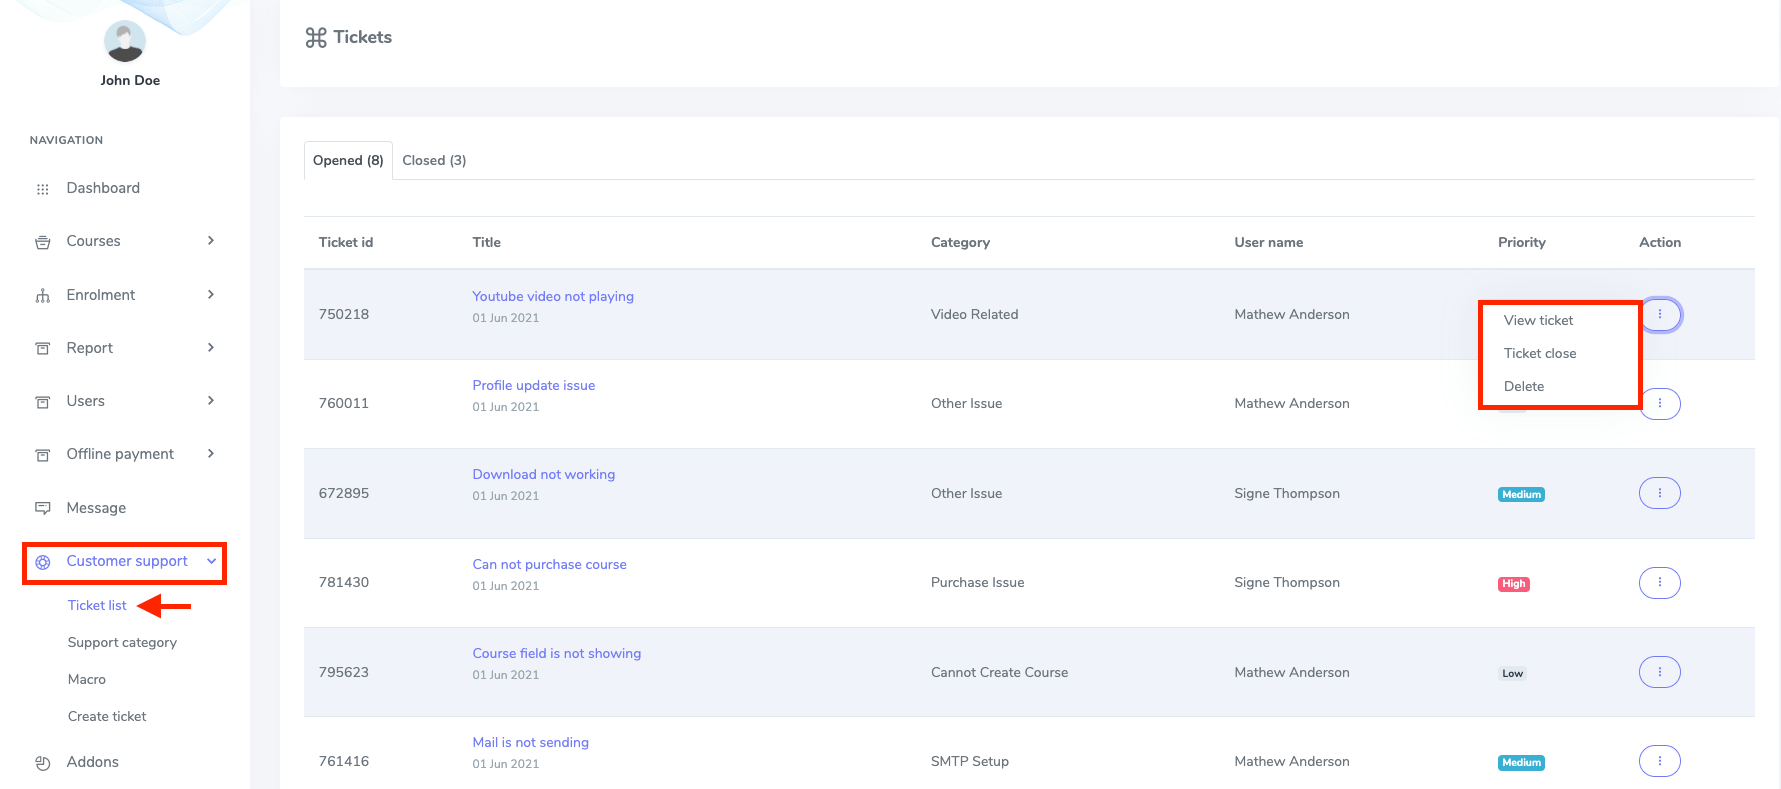
Figure 3. Academy LMS Ticket List (Admin Panel)
In this “Action,” you can reply, close, or delete the tickets. To answer the tickets, you have to click the “View tickets” from the “Action” option. After that:
- Answer the tickets.
- Upload any file from your device.
- Apply the macros.
- Modify the ticket priority.
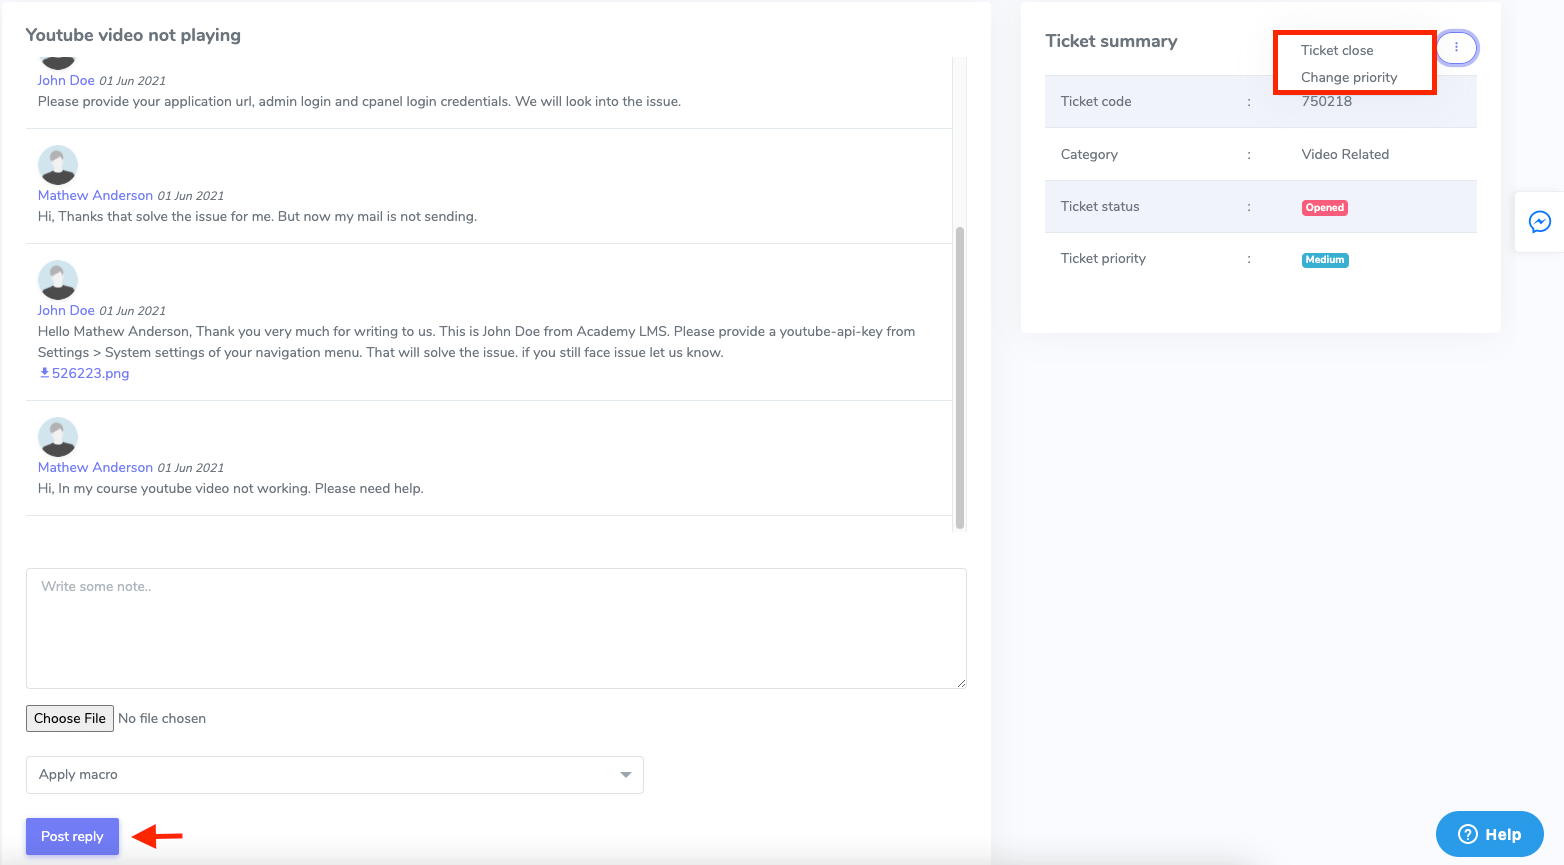
Figure 4. Academy LMS Managing Tickets (Admin Panel)
To close or delete the ticket, you have to click the “Ticket close” or “Delete” button. For confirmation, select the “Continue” button.
You can also create support categories to provide professional support. To add a category, you have to follow the steps:
- Navigate the “Customer support” option from the left menu.
- Select the “Support category” option from the sub-menu.
- Click the “Add new category” button.
- Add a title.
- Click on the “Crete category” button.
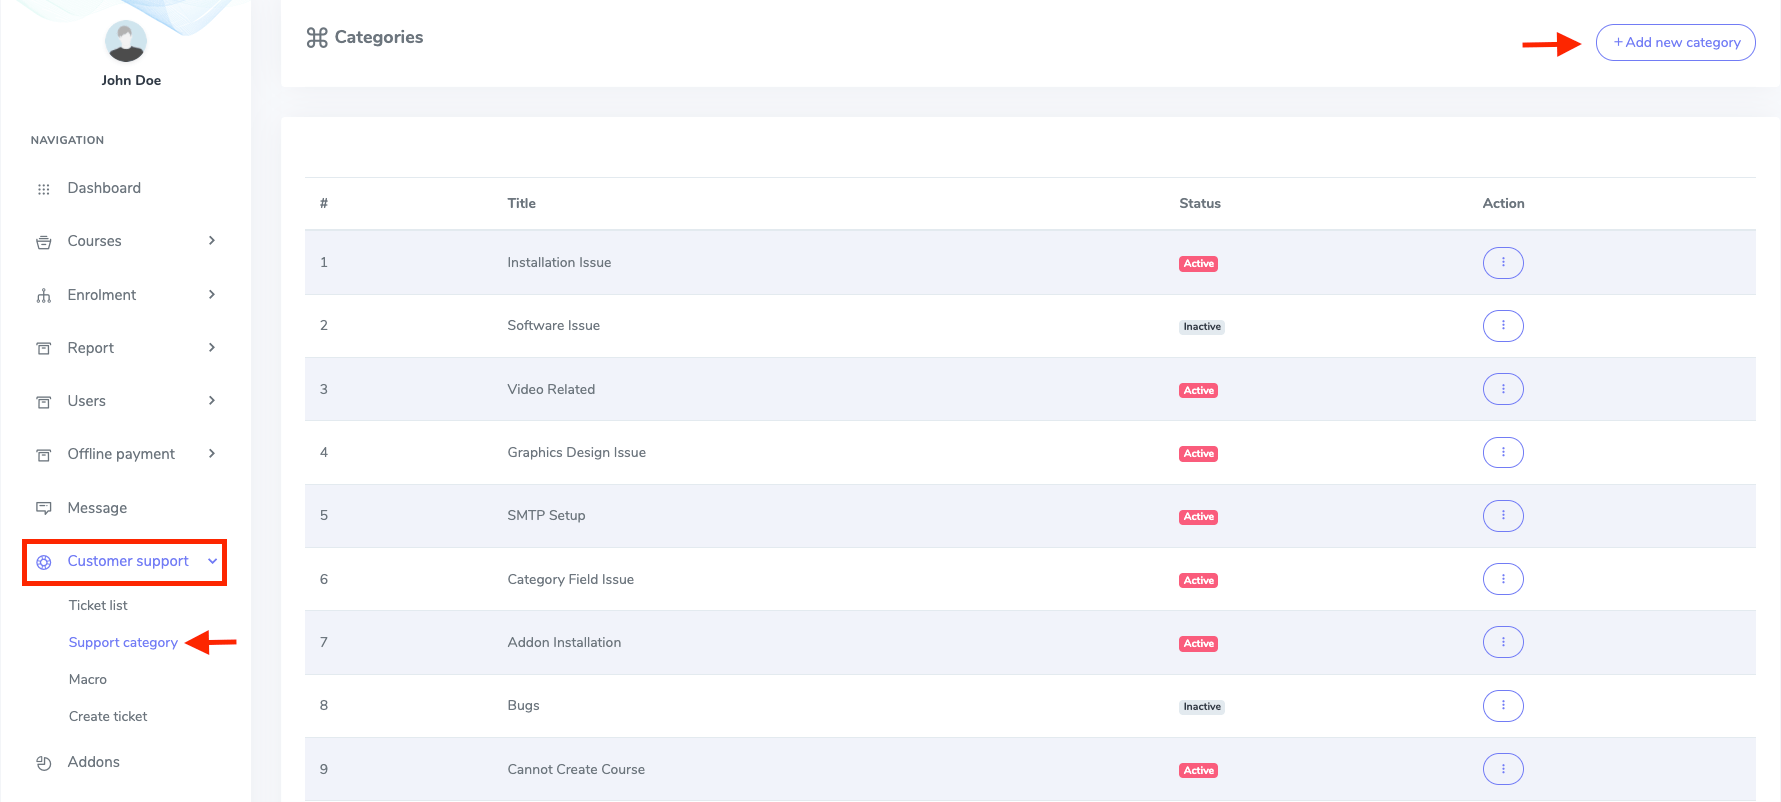
Figure 5. Academy LMS Adding New Customer Support Category (Admin Panel)
You can also update, deactivate, or delete the support category from the “Action” option.
In the macro menu, you can add, edit and delete the macro. To add a new macro, you have to follow the steps:
- Navigate the “Customer support” option from the left menu.
- Select the “Macro” option from the sub-menu.
- Click the “Add new macro” button.
- Provide title and description.
- Click on the “Create macro” button to save your data.
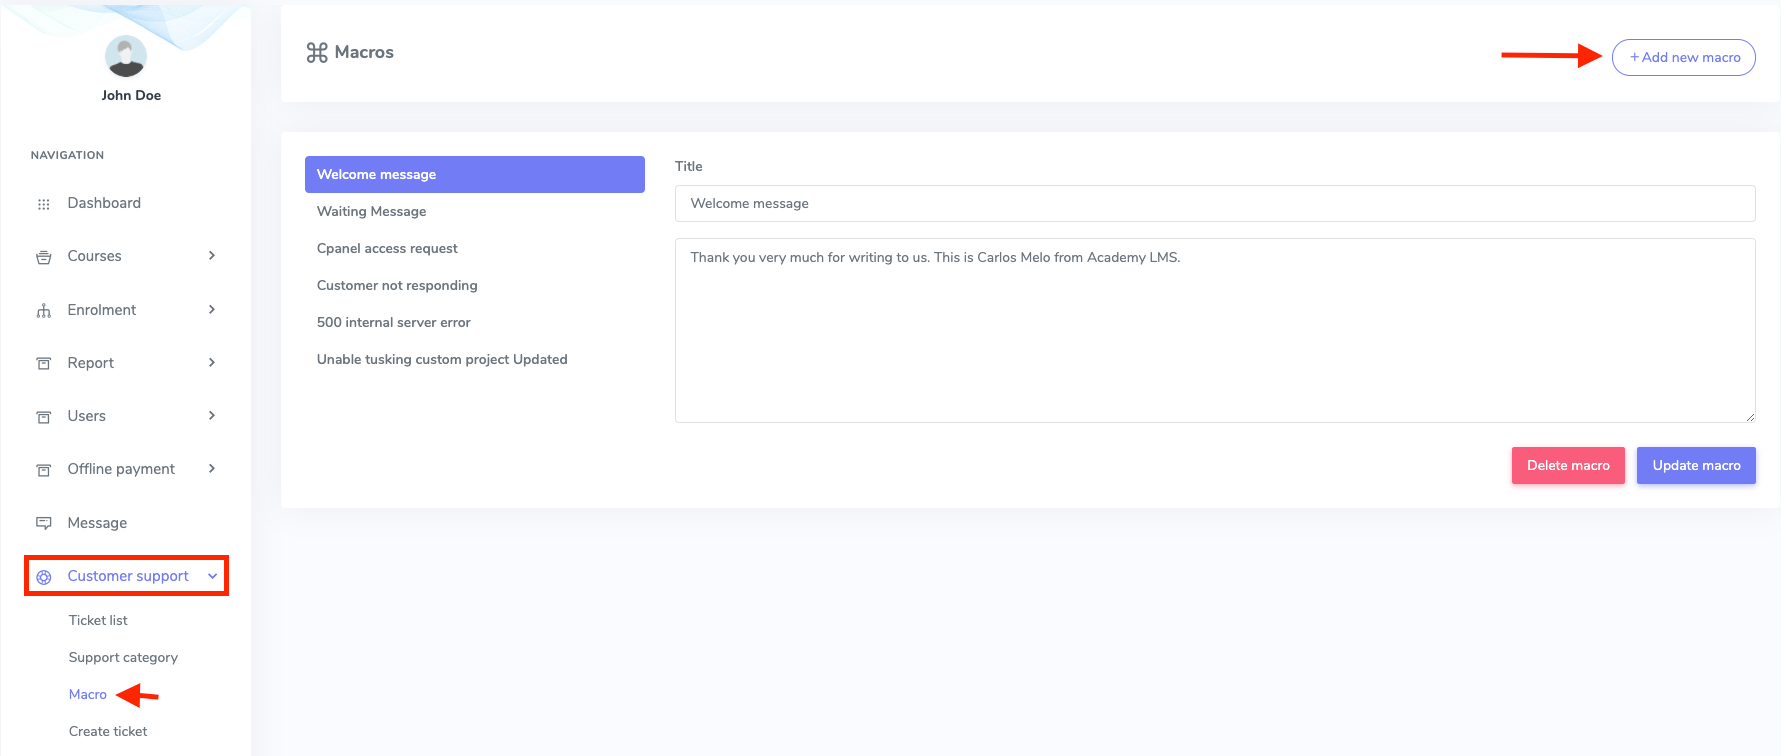
Figure 6. Academy LMS Adding New Macro (Admin Panel)
You can also update or delete the macro from here.
As an admin, you can create a ticket for the user. For this, you have to navigate:
- Go to the “Customer support” option from the left menu.
- Select the “Create ticket” option from the sub-menu.
- Provide the ticket code.
- Title.
- Select category type.
- Choose a user.
- Select the priority.
- Provide description.
- Select a file from your device.
- Click on the “Submit support ticket” button.
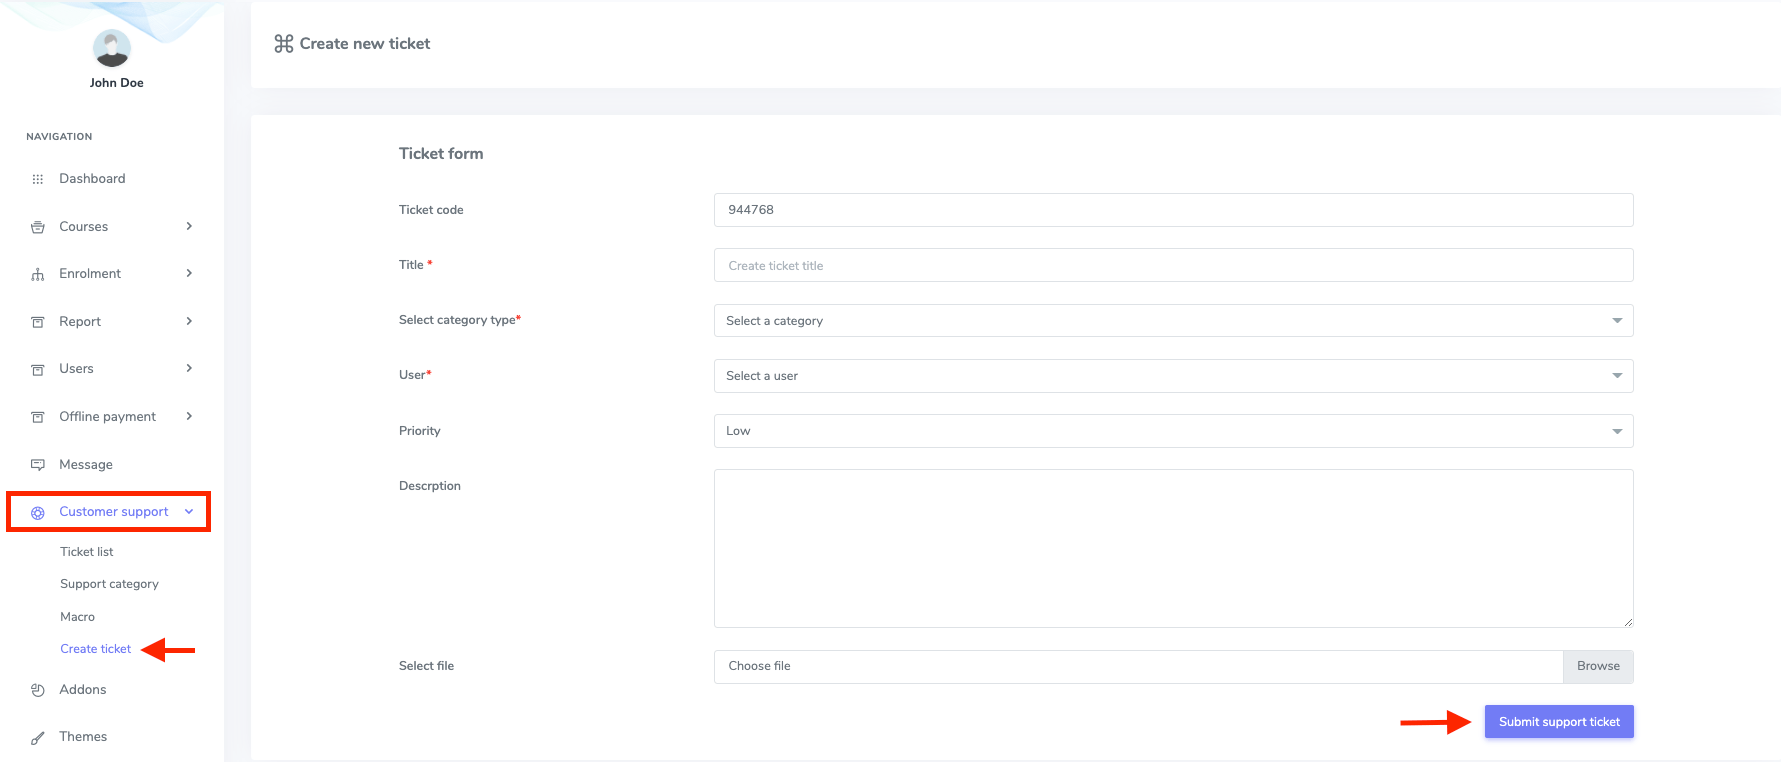
Figure 7. Academy LMS Creating New Ticket (Admin Panel)
Instructor and student panel:
An instructor and student can preview and create a new ticket in Academy LMS. To overview the details of tickets, navigate to the following steps:
- Log in to the user pane.
- Select the “Support” option from the left menu.
- Click on the “Ticket list” option from the sub-menu.
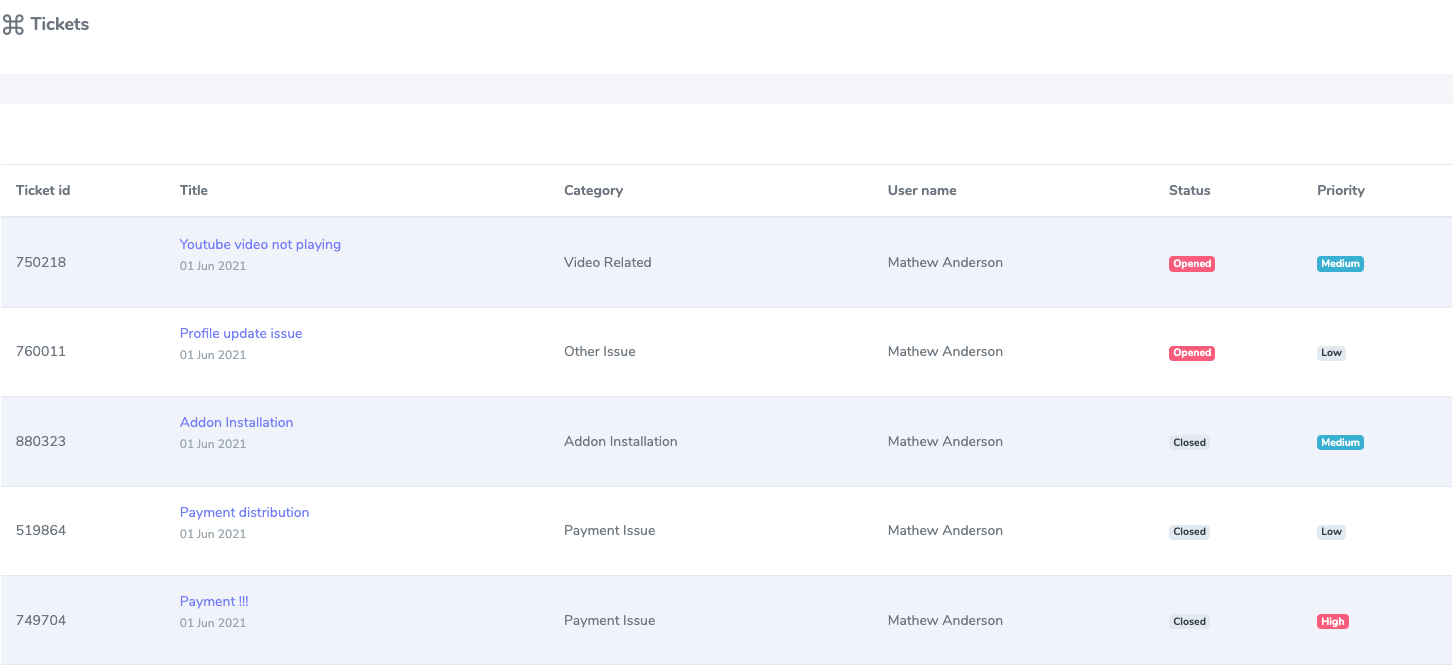
Figure 8. Academy LMS Ticket List (admin Panel)
To create a ticket from the user panel, please follow the steps below:
- Go to the “Support” option from the left menu.
- Select the “Create ticket” option from the sub-menu.
- Provide title
- Select category type.
- Choose the priority.
- Provide description.
- Select a file from your device.
- Click on the “Submit support ticket” button.

Figure 9. Academy LMS Providing Customer Support
That’s it!


